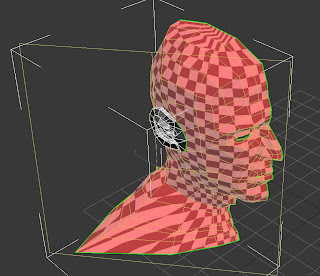
With the head modelled, albeit with a lack of likeness to me, it is ready to be UV Mapped. Turning both turbosmooth and symmetry off and, using paint selection, all of the faces except the ear are highlighted. By going to the modifiers and adding Unwrap UVW, the model is ready to be coloured in. Place a checkered material on the model. This step is essential because by using squares, it is very clear as to where any stretching is occuring.
Within the parameters of the Unwrap UVW modifier,under Map Parameters, select cylindrical. In the top view, resize the yellow circle that should have appeared so it covers the whole model. Using the side view, make sure the cylinder around the model is covering it vertically too. It is also good practise to rotate the cylinder so the green seam line is positiooned at the back of the head. This means that when the texture is applied, the seam line will be in the least obvious place. The model now looks like this, with some pretty obvious stretching and the green seam lines in the appropriate place.
The ear will be connected later, and will be on a seperate part of the texture image. This means that care will need to be taken so there isn't an obvious seam in the material where the two parts meet.
Under the UV parameters, clicking 'edit' will open a window that shows the mapping coordinates. This is where the stretching issues will be fixed. Firstly, the whole piece must be scaled so it fits inside the blue square. Then, by activating vertex selection, the points can be moved around and the checker material in the viewport will change accordingly. The vertices are moved to straighten up the squares.


By moving vertices, relaxing by edges and by centers, the map looks like this:


Thanks, this helped me out a lot. I was confused as to what you're actually supposed to accomplish while sorting out the mapping, but I understand now.
ReplyDeleteGlad it was of assistance :)
ReplyDelete